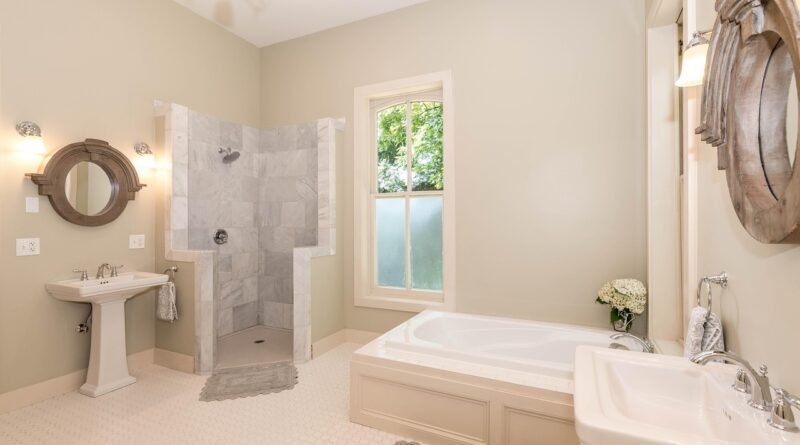
DIY Bathroom Remodel: A Comprehensive Step-by-Step Guide
Though it plays a very vital role in your daily lives, the bathrooms are seldom given the kind of love they deserve when it comes to renovations, considering the rest of the house. So, whether it is about the tiles that haven’t been changed for a decade, the paint that peels, or a fixture that won’t light up, it’s high time that you make your bathroom more practical and more stylish.
A DIY bathroom renovation is a unique way of staying extra within the budget because contractor charges add up rather fast. Most of the time, with just the right planning and tools, anyone can basically change a bathroom with the least amount of money. In fact, thousands of dollars can be saved doing things yourself-on installation, removal of old fixed appliances, refinishing instead of purchasing new ones, and avoiding using expensive products.
Here is an efficient guide for that process. Just follow the next seven easy steps, and voila! You have completed scoring your mark of DIY bathroom remodel.
- Plan your Bathroom Remodel: Before actual change is taking place in the bathroom, it is always safe to lay back into the careful planning of the overall touch-and-feauture designs. The planning phase incurs identifying the project scope to run smoothly without busting its budget.
Decide the Main Factors Before Doing It:
Style of Design: What do you see? Are you going for a more modern, sleek appearance or do you favor more of a rustic, farm-type feel? Buy all the magazines, go online, and check out favorite remodels or design additions on social media. These help on defining colors, materials, and layouts, which may just be in tune with your vision.
New Fixtures: Are you getting a new shower, bathtub, or sink? Relocate all plumbing work if that’s the case because you might need a professional’s help, especially if there are big changes. But, if the updates involve something small, such as new faucets or showerheads, most times you could do this alone.
Storage Needs: Do you have storage synonymous? If you are demolishing a wardrobe or change the design of your bathroom, plan extra provisions like shelves, cabinets, or a new vanity to keep the area pristine.
Utilities and Layout: Importance of knowledge concerning all utilities such wiring, plumbing, and all other powers into from this layout. If these modifications affect you, most probably you’ll have to call in a professional then and avoid a big costliness for mistakes. - Gather Your Tools
The right tools make the job very easier. Listed below are some you might not have. In doing a bathroom remodel, these are the things that one would need to complete the job:
- Safety masks, gloves, and goggles
- Hammer
- Measure tape
- Spackle knife and spackle
- Electric drill
- Pry bar
- Caulking gun with silicone
- Stud finder
- Adjustable wrench
- Flathead screwdriver
- Bucket
- Hacksaw and utility knife
- Optional Tools (but helpful):
Wet-dry Shop-Vac: Best used while tearing down.
Cordless drill: For doing things around tight spaces.
Extension cord: For when you want to run power tools from several feet away.
Rent these and many more from that local hardware store near your house if you don’t own them already.
- Demolition: Removal of Existing Fixtures
Open the old room with gutted fixtures – the ones you’re replacing. Typically, this will be a messy work point, but all is worth it for the designs about to come.
Shutting off the water supply is the first step one should take when removing a toilet, preventing any drip or leakage.
While changing the bathtub, first remove around the tiles, exposing the studs through which a new installation would be done.
When working with insulation and debris from demolition, use safety equipment such as gloves, goggles, and masks. Strip down the premises- cabinets, mirrors, vanity, and flooring. For the flooring, cut across the baseboards for the purpose of reattaching after the new flooring material is put down. - Install Your New Shower or Tub
Then gutted the bathroom. Now it’s time to put on the new fittings. At this stage, you should introduce replacement subflooring if any part of it shows signs of damage or rot before moving on to the new shower or bathtub installation.
Then choose a shower base or bathtub to your liking and liking to that space. Ensure that it will fit both the design of your bathroom and plumbing as well.
As an easy way to modernize and save space, remove a bathtub and install a walk-in shower.
With this in mind, the next shower or tub installed should also match the areas of the rest of the design of the bathroom as close as possible in appropriateness to fulfill its intended function.
Install Flooring Now that all the major fixtures are in place, set up the floors. Tiles are popular among homeowners because they are always water resistant and can be excellent looking in bathrooms. Laminate and vinyl are also great alternatives if one is looking at budget remodeling.
Tips for Installing Bathroom Floors:
Using a mason’s chalk line, create a reference line perpendicular to that wall and use it as your guide to keep tiles straight. You can also use the mortar method for fixing tiles to a subfloor, while lay laminate or vinyl according to the maker’s instructions. - Hang Drywall and Paint
Install the drywall now that the flooring is done. Measuring and cutting the drywall to suit all the different fixtures, such as tub or shower fittings, is important, before finishing with drywall mud to cover seams and smooth surfaces.
In addition, cement board should support the shower or tub wall so that it doesn’t suffer loss from getting damaged with water.
Then, you can do the waterproofing by applying Redgard over the cement board.
Now paint, as the walls are ready. Semi-gloss types of paint work best inside bathrooms as they are easily cleaned and mold resistant.
Install New Vanity, Lighting, and Plumbing Fixtures
Now that the drywall and paint are complete, it is time to install the vanity, cabinets, fixtures, and lighting. The vanity should go in first and should include the sink and faucet. Once it is in its position, you can install the mirror, storage cabinets, and other trim as indicated by the shower/tub area.
Last but not least, you can install new lighting fixtures above the vanity and in other areas of the bathroom. Upgrading to modern mirrors and lighting is one way to freshen up your bathroom. Final Touches: Furnish and Trimming
Major renovations over; time to do the wee touches. Trim in all edges of the room, then do up the space with various things, such as new towels, storage containers, or even artworks to personalize your space. Don’t forget to add new hardware, such as towel bars or hooks, for extra convenience.
Then, just stand back and appreciate the handiwork! Enjoy the newly remodeled bathroom, knowing that it has been done through your own efforts and without the high costs associated with a qualified contractor. Whether a small change or a complete renovation in the bathroom, these steps will guide you to make a stunning bathroom that fits your personality and pocket best. Enjoy Remodeling!